How to Make an iPad Case
This tutorial will show you how to make a case for your iPad 2.
I have been sewing for about 6 months and this fabric iPad case is my first design. This project requires technical skill and patience (both things I tend to lack, so if I can do it I suspect most people with a bit of sewing experience can) and – above all – a lot of measuring, re-measuring, pressing, trimming and lining up. I want to just ZOOM along with the machine, but being neat and precise and patient does pay off (I sound like my mother).
Because this is a soft iPad cover, it’s designed to fit an iPad 2 that has a smart cover on it. You can never be too careful… If you want it to fit an iPad or iPad 2 without a smart cover, you may want to make the fabric a little smaller so it’s a snug fit.
To complete this iPad case project you will need:
- 1 piece outside fabric – 50 cm x 29 cm
- 1 piece lining fabric – 50 cm x 29 cm
- 1 piece light wadding – 49 cm x 28 cm
- 150 cm of bias binding
- 30 cm of Velcro
- white thread
- thread to match the bias binding
- sewing machine, needles, pins, scissors, tape measure
- Cut fabric and wadding
- Sew Velcro onto fabric
- Pin together outside fabric, wadding and lining fabric
- Sew round all edges
- Pin bias binding along inside edge
- Sew bias binding along inside edge
- Fold, check iPad sits comfortably and Velcro matches
- Pin sides
- Sew sides
- Pin bias binding around all edges
- Sew bias binding around all edges
- Neaten off ends and any mistakes by hand
iPad case tutorial – step-by-step instructions:
1. Cut fabric and wadding
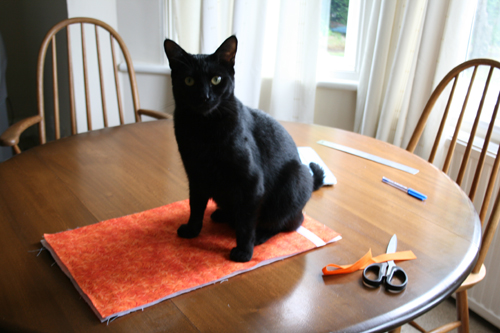
Cut 1 piece of your outside fabric and 1 piece of your lining fabric so that they both measure 50 cm x 29 cm.
Cut your wadding so that it measures just slightly smaller all the way around. By cutting it smaller it makes it easier to sew the edges later on.
The neater and squarer your cutting is, the better. I used a rotary cutter, ruler and mat to get it precise. Press your fabric once it is cut. Press it whenever it is looking a little creased because the flatter your fabric is, the easier it is to work with. I know you don’t want to stop to keep ironing after each stage, but you really should.
By sewing the Velcro on at this stage, you will end up with a neater finish. However, you need to carefully plan where the Velcro will go.
You will need to sew the ‘fluffy’ part of the Velcro onto the outside fabric. It should be approximately 2.5 cm from the edge of the fabric.
You will need to sew the ‘sticky’ part of the Velcro onto the lining fabric. It should be approximately 4 cm from the edge of the fabric.
Pin the Velcro first. Layer up the outside fabric, wadding and lining fabric and try it with the iPad in place to make sure the two sides of the Velcro meet in the right place. It may take some adjusting.
When you are happy with the fit, sew the fluffy Velcro strip onto your outside fabric and the sticky Velcro strip onto your lining fabric. Sew all round the edges of the Velcro in white thread.
3. Pin together outside fabric, wadding and lining fabric

Layer up your outside fabric (right side facing out), your wadding and your lining fabric (right side facing out).
At all times during this project, accept all help offered. If you don’t, you’ll find helpers reluctant to cuddle you when you’re having a nervous breakdown about the bias binding later on…
4. Sew all round edges
Sew a 0.5 cm (1/4 inch) seam around all four sides. This should sew through the outside fabric, the wadding and the lining fabric.
My sewing wasn’t particularly straight and my seams were a bit bulgy in places, so I cheated and neatened up the edges after I had sew them. The straighter and neater the edges are, the easier it will make sewing it all together.
5. Pin bias binding along inside edge
This is where it gets a bit complicated to explain (and a bit complicated to do). By pinning the bias binding and sewing it along the inside first you will get the best – and least frustrating – result.
The first bit of bias binding to add is the easiest because it’s a straight edge. This bit will become the inside edge of your case. As you can see, this is on the edge of the lining fabric that does not have the Velcro on it.
If you flip the flap over, you should see the outside fabric with the edge that does have Velcro on it.
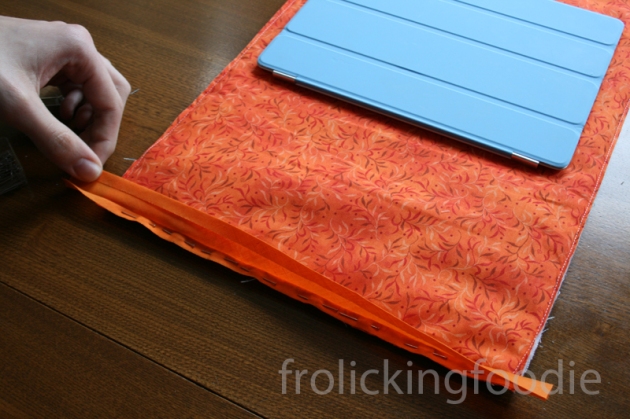
Completely open up your bias binding and pin the inside edge flush up against the material.
6. Sew bias binding along inside edge
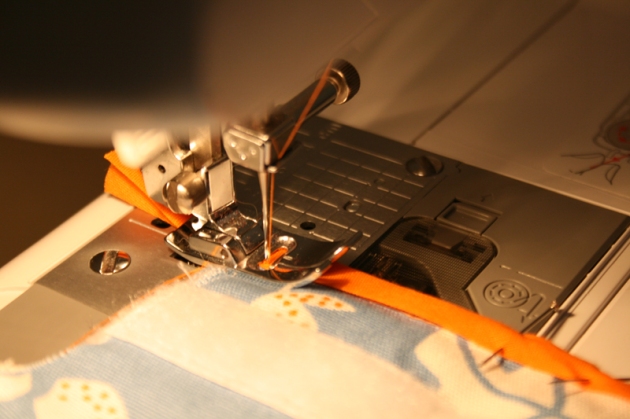
Change your thread to match your bias binding. With the bias binding still open, sew along the edge that you just pinned. Sew as close to the fold as you can manage.
All this sewing will be hidden, but it’s important to do this first step as it keeps your bias binding in place and ensure that you ‘catch’ both sides.
Once you have sewn the bias binding in place, flip your fabric over and fold the bias binding so that it neatly covers the raw edge. Pin it in place.
Sew once again along the bias binding, this time as close to the edge as possible. It will sew all the way through and because you sewed it into place first, it should ‘catch’ all the way along.
You should then end up with a piece of bias binding that neatly covers the inside edge of your iPad cover.
7. Fold, check iPad sits comfortable and Velcro matches
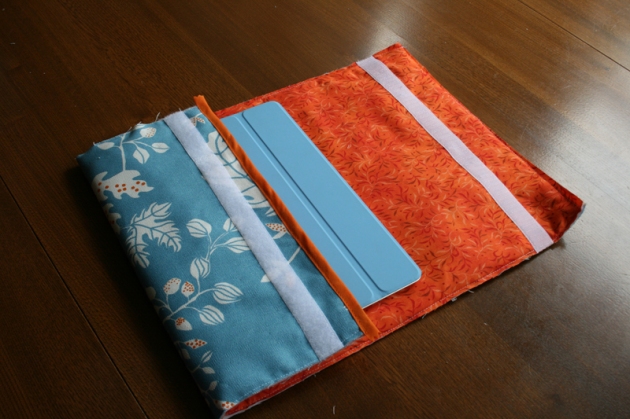
Your iPad case is starting to take shape now. Fold it, make sure it sits snugly and make sure the Velcro matches.
8. Pin sides

Once you’re happy with the fit, pin the sides – make sure you match up the edges as squarely as possible (if you trimmed it earlier after you sewed all round the edges, this is where it pays off).
9. Sew sides
Sew up the sides. You can even sew up to the top of the bias binding to make it nice and strong (this stitching will be covered later).
10. Pin bias binding around all edges
The next stage is to pin the bias binding around all the edges that are left in one long strip, complete with fancily folded corner. I have never done this before and found this How to Attach Bias Tape with Mitered Corners Tutorial really helpful. Like I said earlier, this is the one part of the project that may cause a nervous break down but this method is the easiest way of doing it and I will try and explain how I did it.
Open up the bias binding and pin it flush against the edge, like you did before. Hooray! This feels familiar… but hang on – is that a corner I see up ahead?!
When you get to the corner you need to fold the bias binding back on itself at a 90 degree angle, with the tip of the fold touching the outer corner. Like this:
Then, fold it back on itself so the bias binding sits flush against the other edge. Like this:
If you move your fingers back, you can see there’s a flap:
Now carry on with your pinning along the next edge and you will be left with the bias binding look like this:
Carry on, and do the same thing to the next corner. When you have finished pinning all the bias binding your iPad cover should look like this:
11. Sew bias binding around all edges
Next you need to sew the bias binding all the way around. Like before, this is a two stage process. First you must sew along the inside edge of the bias binding, close to the fold where you just pinned.

Treat this as though you are sewing three separate sides. Sew along the straight edges and when you get about a centimetre away from the corner, STOP.

Cut your thread, turn your fabric and start again about a centimetre away from the other side of the corner. Do all three sides like this.
When you have sewn the inside edges of the bias binding all the way around, your fabric iPad cover will look like this:
Fold the bias binding neatly over the raw edges and pin it.
Pay careful attention to the edges, so they look as neat as possible. I read somewhere that you can never have too many pins when it comes to bias binding. I have come to realise this is a truism.
Once you’ve pinned your bias binding in every which way, you need to sew the bias binding in place, around all sides and across the corners. Because you anchored it in place, it should catch beautifully on both sides.
You will now have something that looks like this:
12. Neaten off ends and any mistakes by hand
All that remains is to trim the bottom edges down and sew them up by hand.
Also, if you missed any bits that need strengthening (like this corner) do it by hand.

And there we have it! One funky handmade iPad case, ready to protect and serve.


I am going to talk about a current YouTube influencer on the internet strategythat NordicTrack accustomed take their content viral.
There are comprehensive ranging fantastic automobiles out there and discovering what youare in look for of is pretty easy supplied you are looking arduous enough.
This is very very helpful. And I love your choice of colors. I’ll see if I can adapt it to an iPad mini size… Also, I think I’ll try hand quilting. If this becomes too much of a chore, iPad mini size, then I *know* I shouldn’t attempt a quilt!
Hello there! This is kind of off topic but I need some help from an established
blog. Is it difficult to set up your own blog? I’m not very techincal but I can figure things out pretty fast. I’m thinking about making my own but I’m not sure where to begin. Do you have any ideas or suggestions? Thanks
I love your blog.. very nice colors & theme. Did you design this website yourself or did you hire someone
to do it for you? Plz respond as I’m looking to construct my own blog and would like to find out where u got this from. thanks
Have hunted everywhere for instructions for and iPad cover. Yours are soooooo easy to follow. Thank you.
Thank you allybee – I hope your project goes/went well!
Awesome tutorial!! Love my new ipad case 🙂
Pingback: iPad Case | flossie jamieson
Pingback: How to make an iPad case take two | Gemma Holtam
Nice blog! Is your theme custom made or did you download
it from somewhere? A theme like yours with a few simple adjustements would really make my blog jump out.
Please let me know where you got your theme. Thanks
Hi come here, it’s a custom theme that was then hacked about a bit to get an extra column.
Thank you so much for the image of the metered corners. Very hard to find this online!! Very helpful!
Hey Sheri, thanks for leaving the comment. The corners were definitely tricky and took me a while to work out from descriptions on the internet – glad the pictures were useful for you.
Looking forward to trying this but going to install magnets under the fabric instead of Velcro. I think it’d look nicer and lasts longer – no Velcro fray. Thanks so much!
Magnets and computers/electronics are bad mixes! You can damage your electronic this way!
How do I get to the tutorial? You did a very nice job, looking to make one myself, been sewing for many years but always learning new things.
Hi again
You know I could make an iphone cover. Would you have the dimensions of the size of material I would need.
Hi, can I still make this size for iPad 1. Still the same measurements?
Thanks for the tutorial. It looks so straight forward, yet beautiful. Can’t wait to try it.
Great job! I love it!
Please send me an iPad 🙂
My next project thanks for the tutorial!
Great article Alice!
I don’t have an ipad but it has given me an idea for my laptop.